
Forget dusty appliances languishing in your pantry. Unleash the inner artist within and transform your blender into a creative haven for edible delights! The humble blender, once relegated to smoothie duty, is now the key to crafting culinary masterpieces that are as visually stunning as they are delicious.
Why Blenders?
Here’s why your blender deserves a starring role in your culinary adventures:
- Versatility: From silky smooth dips and sauces to fluffy cakes and creamy frozen treats, the possibilities are endless.
- Time-saving: Chop, blend, and pulverize ingredients in a matter of minutes, freeing up precious time for other kitchen tasks.
- Nutritional powerhouse: Unlock the full potential of fruits, vegetables, nuts, and seeds by breaking them down into easily digestible forms.
- Creative canvas: Experiment with color, texture, and flavor combinations to create edible works of art that will impress guests and tantalize taste buds.
Let the Art Flow!
Here are some inspiring ways to turn your kitchen into a blender playground:
- Vibrant Smoothies: Go beyond the classic green smoothie and explore a rainbow of flavors. Blend exotic fruits like mango and guava with creamy yogurt and a touch of ginger for a tropical treat. Or, try a savory smoothie with spinach, avocado, and cucumber for a refreshing and energizing boost.
- Dips & Spreads: Ditch the store-bought dips and whip up your own healthy and flavorful creations. Blend roasted vegetables like beetroot and hummus for a vibrant and earthy dip, or combine roasted sweet potato with tahini and spices for a creamy and satisfying spread.
- Frozen Delights: Beat the summer heat with icy treats that are both healthy and delicious. Blend frozen fruits with yogurt and honey for a refreshing and guilt-free sorbet. Or, try your hand at homemade ice cream by blending frozen bananas, nut butter, and cocoa powder for a decadent treat.
- Soups & Sauces: Create restaurant-quality soups and sauces in minutes. Blend roasted vegetables with broth and spices for a creamy and flavorful soup. Or, whip up a quick and easy pesto by blending together fresh basil, pine nuts, parmesan cheese, and olive oil.
Tips & Tricks for Blending Success:
- Use ripe fruits and vegetables: This will ensure the best flavor and texture.
- Start with liquids: Adding a liquid like water or milk will help your blender blend smoothly.
- Blend in stages: Don’t try to cram everything into the blender at once. Start with the base ingredients and gradually add other ingredients until you reach the desired consistency.
- Use the pulse function: This is a great way to chop ingredients without liquefying them.
- Experiment! Don’t be afraid to get creative and try new flavor combinations.
So, dust off your blender, grab your favorite ingredients, and get ready to explore the exciting world of edible art! Remember, the kitchen is your playground, and your blender is your creative tool.
Beyond the Basics: Techniques for Elevating Your Blending Game
While the basic principles of blending remain the same, there are countless ways to elevate your culinary creations and truly showcase your artistic flair. Here are some advanced techniques to explore:
Layering: Create visually stunning smoothies or parfaits by layering different colored and textured ingredients. Start with a thick base, like a smoothie or yogurt, and then carefully add dollops of fruit puree, chia pudding, or granola.
Texture Play: Don’t just focus on smooth and creamy textures. Experiment with contrasting textures for added visual and sensory interest. Add chopped nuts, seeds, or granola for a satisfying crunch, or use frozen fruit chunks for a refreshing burst of icy texture.
Color Fusion: Create vibrant and eye-catching blends by using natural food colorings. Blend beetroot powder for a rich pink hue, or add spirulina powder for a vibrant green color. You can even use natural dyes from fruits and vegetables, like turmeric for a bright yellow or blueberries for a beautiful purple.
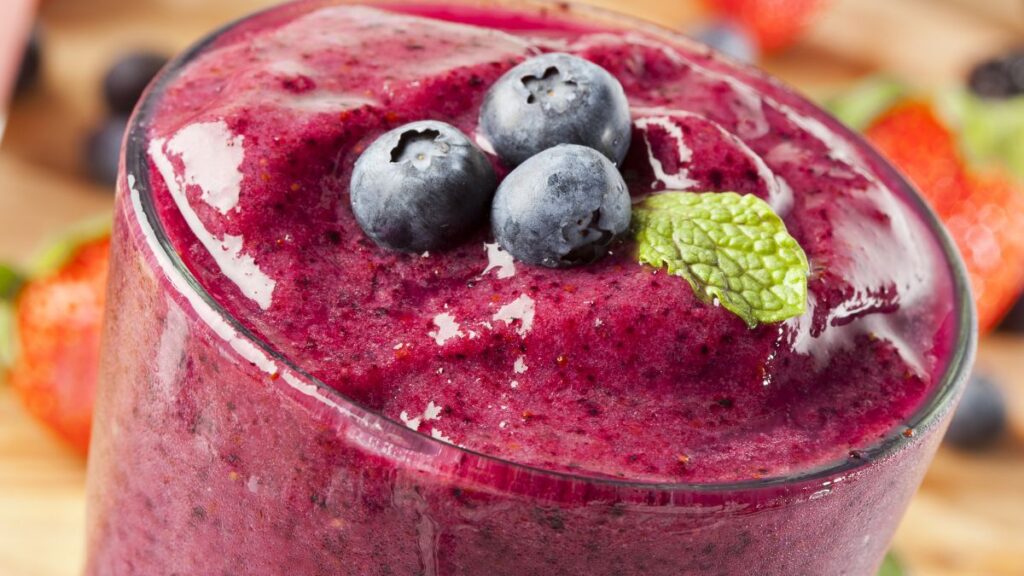
Garnishes Galore: Elevate your presentation with creative and delicious garnishes. Think beyond the basic whipped cream and sprinkles. Try using edible flowers, fresh herbs, toasted coconut flakes, or even chopped nuts and seeds for a touch of sophistication.
Freezing Fun: While frozen fruits are a staple in many blender recipes, consider freezing other ingredients to expand your options. Freeze fresh herbs for an extra flavor boost, or freeze leftover avocado slices for a creamy and healthy addition to smoothies and dips.
The Power of Combinations: Don’t be afraid to experiment with unexpected flavor pairings. Blend savory ingredients like spinach with sweet fruits like banana for a surprisingly delicious smoothie. Or, combine roasted vegetables with sweet spices like cinnamon and ginger for a unique and flavorful soup.
Tools of the Trade: While a basic blender can take you far, consider investing in additional tools to further enhance your blending experience. Tamper attachments can help you incorporate thicker ingredients and ensure smooth blending. Additionally, a high-powered blender can open up new possibilities for grinding seeds, nut butters, and even making your own almond milk.
Remember, the key to creating edible art with your blender is to have fun and be creative. Don’t be afraid to experiment, explore, and express your unique culinary vision. With a little practice and imagination, your blender can become your gateway to a world of delicious and visually stunning creations.
Frequently Asked Questions: The Blender’s Playground
Can you make edible art with a blender?
Absolutely! Blenders offer an incredible opportunity to create visually stunning and delicious edible art. They can help you achieve smooth textures, vibrant colors, and even layered effects, making your food a feast for both the eyes and the taste buds.
What types of edible art can you create with a blender?
The possibilities are endless! Here are some popular ideas to get you started:
- Smoothies: Layer different colored fruits and vegetables for a rainbow effect, or top with edible flowers and granola for a touch of elegance.
- Dips and spreads: Create vibrant hummus with roasted beetroot, or whip up a creamy avocado pesto.
- Frozen treats: Blend frozen fruits with yogurt and honey for a refreshing sorbet, or experiment with homemade ice cream flavors.
- Soups and sauces: Make restaurant-quality creamy tomato soup or a vibrant green pesto in minutes.
- Desserts: Blend frozen bananas and nut butter for a healthy and delicious chocolate “nice cream,” or create parfaits with layers of yogurt, granola, and fruit puree.
What are some tips and tricks for creating edible art with a blender?
- Use ripe ingredients: This will ensure the best flavor and texture.
- Start with liquids: Add water, milk, or another liquid to help your blender achieve a smooth consistency.
- Blend in stages: Don’t overload the blender. Start with the base ingredients and gradually add others until you reach the desired texture.
- Pulse function: This is helpful for chopping ingredients without liquefying them completely.
- Experiment!: Don’t be afraid to get creative and try new flavor combinations and techniques.
What additional resources are available to help me create edible art with my blender?
There are many resources available online and in cookbooks to inspire your culinary creativity. Here are a few suggestions:
- Websites:
- [Link to website with creative blender recipes]
- [Link to website with blender tips and tricks]
- [Link to the blog The Blender Girl]
- Cookbooks:
- “The Blender Girl: Super-Easy, Super-Delicious Recipes” by Tess Masters
- “The Smoothie Bible” by Kimberly Snyder
- “100 Blender Recipes” by The Spruce Eats
What are some common mistakes to avoid when creating edible art with a blender?
- Overfilling the blender: This can lead to uneven blending and overheating.
- Not using enough liquid: This can result in a thick and chunky texture.
- Processing for too long: This can break down the ingredients too much and make your creation mushy.
- Not tasting and adjusting as you go: This can leave you with a final product that doesn’t taste as good as it could.
What are some helpful tools for creating edible art with a blender?
A high-powered blender can open up new possibilities for grinding seeds, nut butters, and even making your own almond milk. A tamper attachment can also be helpful for incorporating thicker ingredients and ensuring smooth blending.
I’m new to creating edible art. Where should I start?
Start with simple recipes that use familiar ingredients. Once you feel comfortable with the basics, you can start to experiment with more complex techniques and flavors.
1 thought on “The Blender’s Playground: Creating Edible Art with Blenders”
Comments are closed.